A picture of some graffiti in the train yard. I like the way this one came out. I used Gimp for the editing, but only resized the image, and adjusted the brightness and contrast. I probably should of used this photo for the brightness and contrast tutorial I wrote, because when I adjusted the contrast, it really brought out the colors in the graffiti, and also the rust on the train cars.
Welcome to My Amateur Photo. I created this blog as a way to document my progress as an amateur photographer and also help others who may have an interest in this hobby. The blog covers tutorials, tips, tricks, and various resources for taking and processing digital images using an SLR camera.
Topics include, Gimp 2.8, Darktable, tutorials, and tips on taking great images and using your DSLR camera.
Showing posts with label brightness and contrast. Show all posts
Tuesday, February 12, 2013
Graffiti In The Train Yard.
A picture of some graffiti in the train yard. I like the way this one came out. I used Gimp for the editing, but only resized the image, and adjusted the brightness and contrast. I probably should of used this photo for the brightness and contrast tutorial I wrote, because when I adjusted the contrast, it really brought out the colors in the graffiti, and also the rust on the train cars.
Monday, January 21, 2013
Using Gimp To Enhance Brightness Contrast
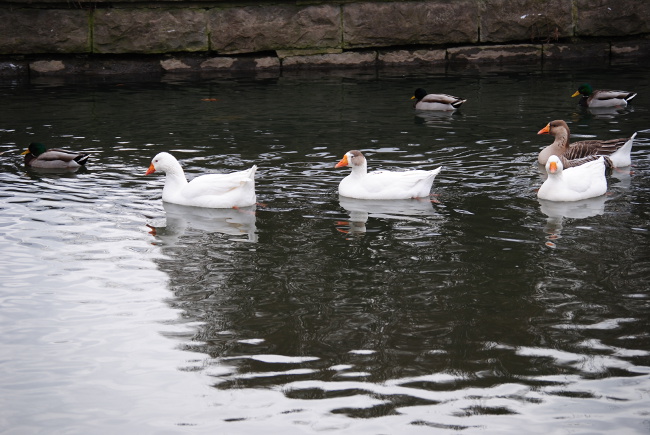
I snapped some images of ducks the other day. I thought I would post a quick tutorial on using Gimp, to adjust the contrast and brightness of a photo.
Adjusting the contrast and brightness of a photograph in Gimp is a great way to make some subtle changes to a photo. By adjusting the contrast you can give the image a slightly richer look. This will lighten or darken the image, and also help bring out or remove some of the shadows. I also feel it helps to slightly enhance some of the colors.
This is a really simple process to do, and worth the 2 or 3 minutes it takes to do. The screen shot shows you where to go in Gimp. You can use your own photo or download the original unedited duck photo here at 4shared. The original file is jpeg, 2.3 megabytes, and 3872 x 2592. If you look at the before and after of this picture, the changes are very subtle and barely noticeable. However when you load an image in Gimp and try this for yourself you will see exactly what I'm talking about.
O.K., open Gimp and load either your image or my image into it. Now click on colors, and then find brightness - contrast. Click on brightness - contrast and when the dialog box opens, set the sliders as shown in the screenshot, or however you think they look nice. Your done. Quick, painless, it took less than 2 minutes, and added a little special something to your image. I'm currently doing this to just about every image I process. When your done, click file, export, and then export the image as whatever-filename.jpg.Here are the before and after pix,very subtle and barely noticable with the naked eye. As an amateur photographer though, we can use all the extra help we can get. Play around with different images using this technique and you'll be surprised at what this little adjustment can do for some of your pictures.
Thanks for reading and happy photographing.
Adjusting the contrast and brightness of a photograph in Gimp is a great way to make some subtle changes to a photo. By adjusting the contrast you can give the image a slightly richer look. This will lighten or darken the image, and also help bring out or remove some of the shadows. I also feel it helps to slightly enhance some of the colors.
This is a really simple process to do, and worth the 2 or 3 minutes it takes to do. The screen shot shows you where to go in Gimp. You can use your own photo or download the original unedited duck photo here at 4shared. The original file is jpeg, 2.3 megabytes, and 3872 x 2592. If you look at the before and after of this picture, the changes are very subtle and barely noticeable. However when you load an image in Gimp and try this for yourself you will see exactly what I'm talking about.
O.K., open Gimp and load either your image or my image into it. Now click on colors, and then find brightness - contrast. Click on brightness - contrast and when the dialog box opens, set the sliders as shown in the screenshot, or however you think they look nice. Your done. Quick, painless, it took less than 2 minutes, and added a little special something to your image. I'm currently doing this to just about every image I process. When your done, click file, export, and then export the image as whatever-filename.jpg.Here are the before and after pix,very subtle and barely noticable with the naked eye. As an amateur photographer though, we can use all the extra help we can get. Play around with different images using this technique and you'll be surprised at what this little adjustment can do for some of your pictures.
| After changes, you can see the difference in the rocks, the shadowing in the corners, and also a little more color in the bills of the ducks |
| .original |
Tuesday, January 1, 2013
The Boring Cat Pic
Here's a boring cat picture. Shot with a 16 - 55 mm lens. Cropped in Gimp, and then I adjusted the Brightness and Contrast a bit. When I brought the brightness up just by like 3 and contrast down by 2 it really made the black and white of his fur stand out.
Subscribe to:
Posts (Atom)